
What indicator lights do on kitchen equipment
Indicator lights are the small lamps fitted to control panels so staff can see what a machine is doing without opening the unit or guessing from noise alone. On an oven, a light may show mains power or heater cycle. On a fryer, it can confirm heat demand or a fault condition. On a dishwasher, it helps the operator see when a cycle is live, when water is heating, or when the unit needs attention.
In a busy kitchen, that simple signal matters. It cuts down on unnecessary calls, prevents operators from forcing a unit on and off, and helps with quicker fault finding during service. In areas with load-shedding, voltage dips and generator changeovers, a clear status light can also help staff tell the differnce between a supply issue and a real part failure.
Common types, sizes and lens options
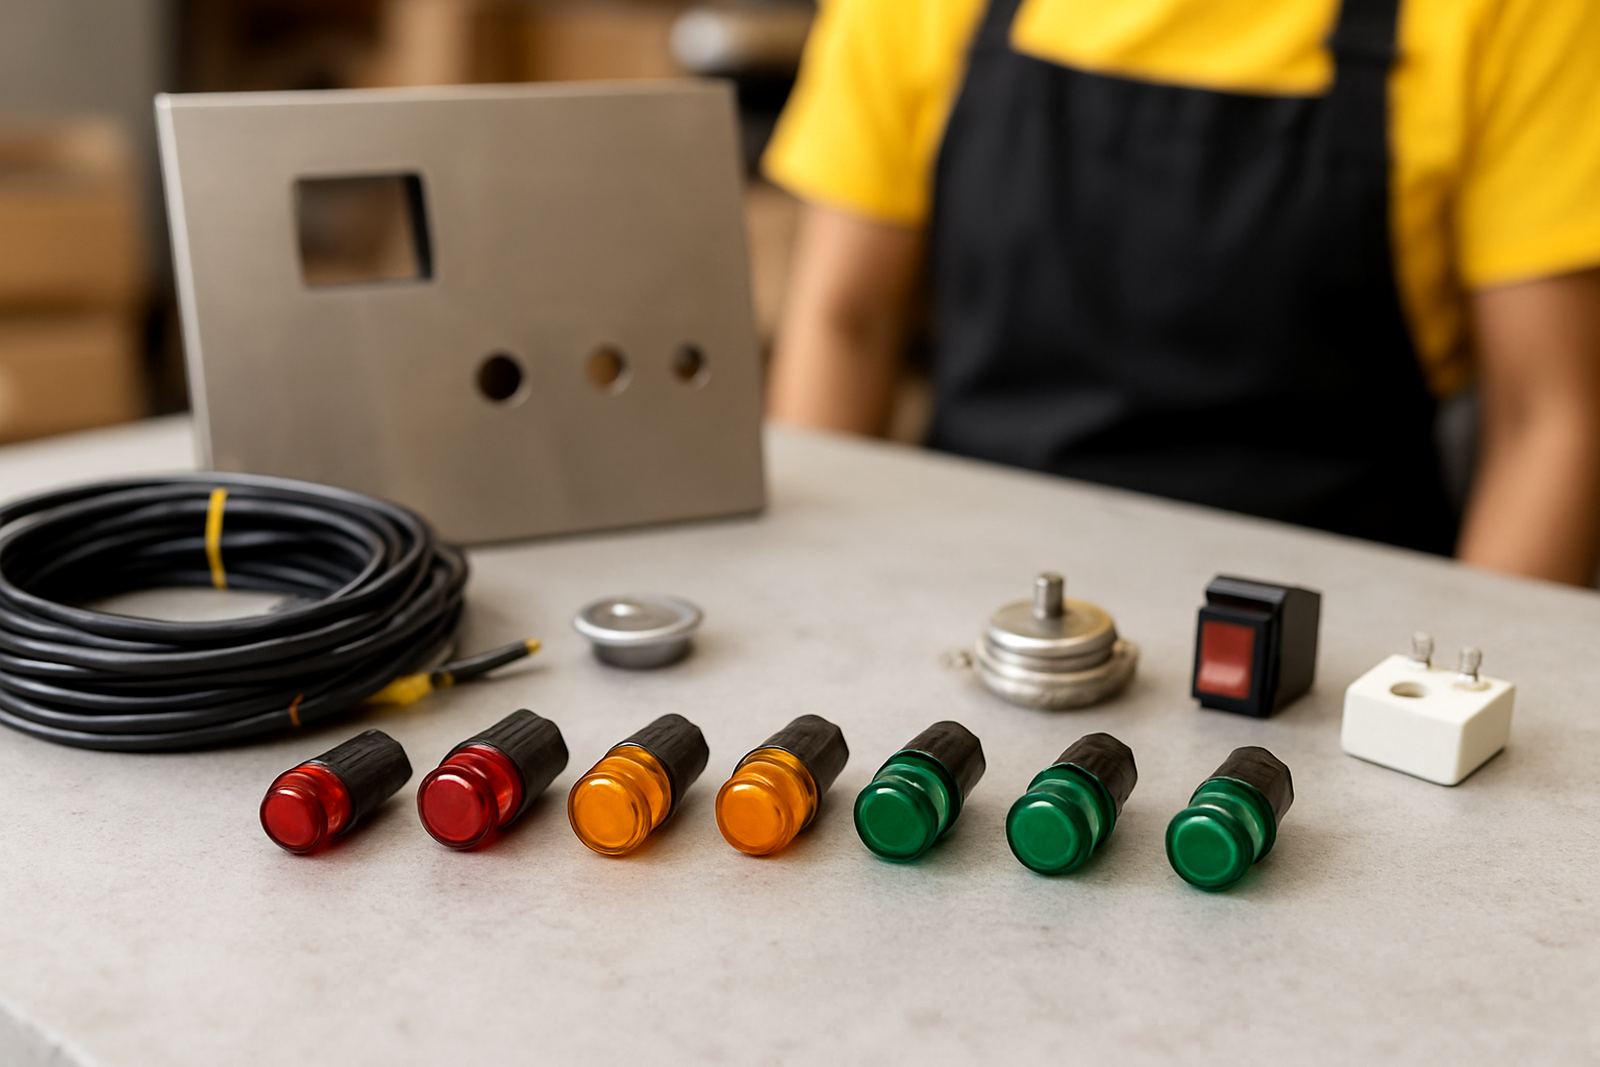
Indicator lights come in different body sizes, voltages and lens colours. The most common units for catering equipment use panel-mount fittings with a threaded body, a retaining nut and two terminal connections. Some have built-in resistor or neon style internals, while others use replaceable lamp modules. The correct type depends on the machine wiring and the panel cut-out already in place.
- Common cut-out sizes: 6 mm, 8 mm, 10 mm, 12 mm and 16 mm
- Typical voltages: 12 V, 24 V, 110 V, 220 V and 230 V AC
- Lens colours: red for fault or power, amber for heating or attention, green for running, blue for water or function status
- Mounting styles: panel nut mount, snap-in bezel or bracket fit depending on the control panel
- Terminal types: spade, screw or flying lead depending on the unit
When the panel hole is too small or too wide, the lamp will sit poorly and can work loose with vibration. That is common on older ovens and dishwashers that have seen years of service in Johannesburg, Cape Town and Durban kitchens where heat, cleaning and daily use take a toll.
Where they suit best in commercial kitchens
These lights suit ovens, combi ovens, fryers, hot cupboards, bain maries, dishwashers, proofers and control boxes on prep equipment. They are also used on isolated switches and sub-panels where an operator needs a clear visual check before touching the machine. In some cases, they are fitted with high-temperature lenses so the lamp can sit close to oven fascia panels without softening or discolouring.
For coastal sites, especially around Durban and the Cape, it is worth choosing a lamp with better corrosion resistance on the terminals and mounting nut. Humidity and repeated wash-down can cause cheaper fittings to go green at the contact point, then the light starts flickering or fails altogether. In a site with a stainless steel control face, a loose fitting can also let steam into the panel and cause nuisance trips.
- Suitable for front control panels and status bezels
- Useful on heat, power and fault indication circuits
- Better with sealed lenses in splash-prone areas
- Recommended for equipment that is switched often during trading hours
Installation basics and supply checks
Before fitting an indicator light, confirm the supply voltage and the wiring method used by the appliance manufacturer. A lamp rated for 230 V AC will not suit a 24 V control circuit, and the wrong fitting can blow immediately or stay dim. For low-voltage systems, polarity may matter where LED style lamps are used. On older units, especially imported ovens and fryers, the panel circuit may share a common neutral or run through a thermostat chain, so the wiring should be checked before any swap.
Installation usually involves isolating the machine, removing the old lamp, cleaning the panel opening and confirming the retaining hardware is not stripped. If the terminal blades are burnt or the insulation is brittle, the issue may be more than the light itself. We also advise checking for heat damage behind the fascia, because a failed lamp can be a symptom of a loose connection or overloaded circuit.
- Isolate power before removing a panel light
- Match voltage and lamp type to the existing circuit
- Check hole size, terminal style and mounting depth
- Inspect wiring for heat marks, loose spades and cracked insulation
Care, cleaning and service life
Indicator lights do not need much servicing, but the surrounding panel does. Keep the lens clean so the signal stays visible through grease, flour dust and detergent spray. Use a damp cloth and mild cleaner only, never a hard scraper that can scratch the lens or lift the bezel. On fryer lines, wipe away oil mist before it bakes onto the faceplate, because heat will harden that film and make the light harder to read.
If a lamp flickers when the machine warms up, or only works when the panel is tapped, the fitting or the wire connection may be loose. That is common after repeated vibration on extractor-heavy sites. If the machine is in a coastal kitchen or a cold room area, check for condensation inside the panel as well. A clear lens with moisture behind it is usually a warning sign that the seal is failing.
What to check before you order
To get the right indicator light first time, send us the details from the old part or the appliance panel. If the lamp is still fitted, a clear photo helps. If it is missing, measure the hole and note the wiring type. On some machines the exact size looks close, but a 10 mm body will not sit correctly in a 12 mm opening and the panel nut will not grip properly.
- Voltage rating on the old lamp or control diagram
- Cut-out diameter and panel thickness
- Lens colour and whether it is lit for power, heat or fault
- Terminal style and wire length
- Whether the fitting must handle heat, steam or splash exposure
- Make and model of the appliance if available
If you are unsure, our team can help with part identification and compatibility checks before dispatch from Midrand. For kitchens in Pretoria, Johannesburg, Bloemfontein, Durban or Cape Town, this saves time and cuts down on repeat visits. We can also assist with element fitting, thermostat fitting, gasket fitting, burner fitting and post-fit testing when the light forms part of a wider repair.
Key facts
| Product type | Commercial appliance indicator light, pilot lamp or status light |
|---|---|
| Typical voltages | 12 V, 24 V, 110 V, 220 V and 230 V AC |
| Common cut-out sizes | 6 mm, 8 mm, 10 mm, 12 mm and 16 mm |
| Lens colours | Red, amber, green and blue |
| Mounting | Panel nut, snap-in bezel or bracket fit |
| Typical applications | Ovens, fryers, dishwashers, hot cupboards and control panels |