
Start with the exact oven door or cavity you are measuring
Before you take out a tape measure, make sure you are looking at the correct seal. On commercial ovens the gasket may sit on the door, around the frame or in a channel inside the cavity, and the shape can vary even on ovens that look similar from the outside. If the old seal is still in place, use it as your first reference point, but do not trust the old part alone because it may have stretched over time.
Switch the oven off and let it cool fully. If the unit has been running through a breakfast rush or a lunch service, wait long enough that the metal frame is comfortable to touch. In busy kitchens around Johannesburg or Midrand, we see operators trying to measure in a hurry between services and that is when a 10 mm error slips in.
- Confirm the oven make, model number and serial plate if it is still readable.
- Check whether the gasket fits a door, frame or inner liner.
- Look for corners, joins and retaining clips before you remove anything.
Measure the old seal before you remove it if possible
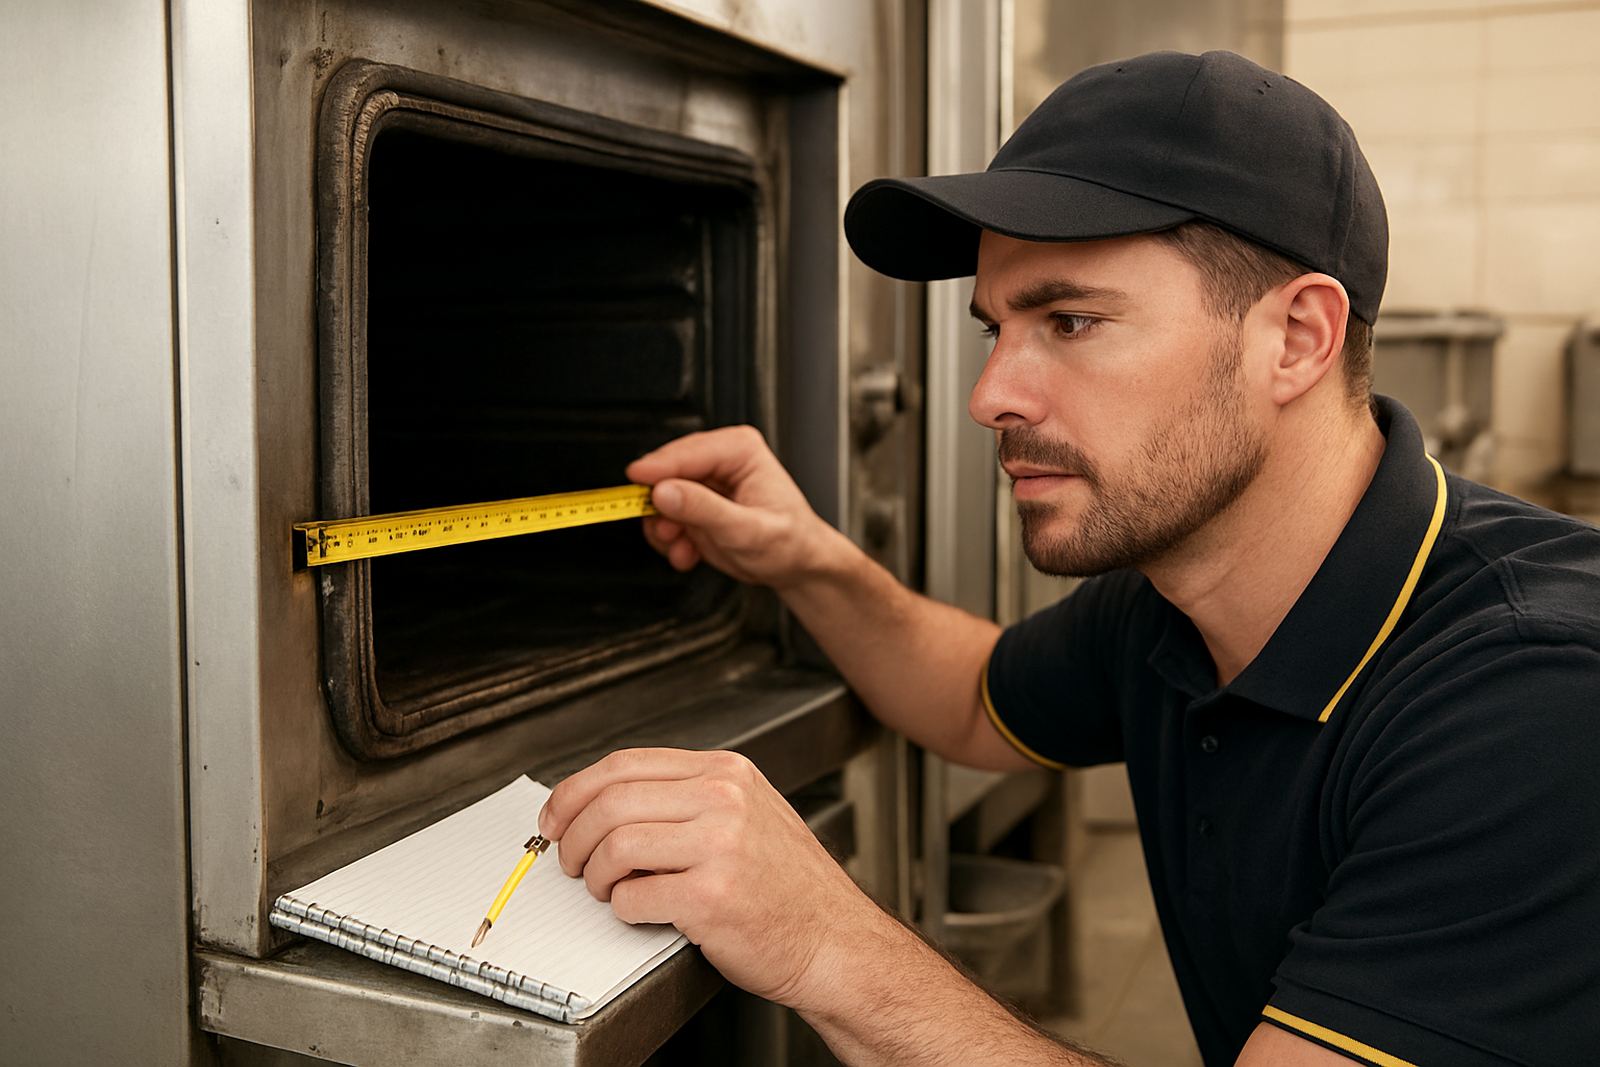
If the gasket is still intact, lay it flat on a clean surface and measure it end to end. For a round cord style seal, measure the full outer length around the perimeter. For a formed seal, follow the actual path the gasket takes in the door channel, not the straight line across the middle. A measuring tape is usually enough, but a ruler helps when you need to check the width of a lip or fin.
Write down every figure, then take the measurements again. It sounds simple, but in a kitchen with steam, grease and staff moving past, numbers get mixed up fast. A small notebook in the dry store works better than trying to remember them later when someone is calling for a replacement element or thermostat too.
- Overall perimeter length
- Profile width and thickness
- Corner shape, rounded or square
- Any clips, pins or fixing tabs
Check the profile, not only the length
Length matters, but the profile is what helps the seal sit properly and hold heat. Some oven gaskets have a hollow bulb, some use a flat strip with a retaining flap and others have a shaped edge that locks into a groove. If you only order by length, the new seal may fit in theory and still leak in practice.
Look closely at the old seal from the side. You want to know if it is compressed, split or flattened in one area. Coastal kitchens in Durban often deal with more moisture in the air, so rubber and silicone seals can harden or swell faster than expected. That changes the way the door closes and can leave a gap at the latch side.
When in doubt, take photos from the front, side and one corner. A clear photo sent with the measurement can save a lot of back and forth, especially when the oven is on the line for dinner prep.
Measure the opening as a back-up check
If the old gasket is missing, badly damaged or too stretched to trust, measure the opening where it sits. Do this on the door frame or cavity edge rather than on the outer oven casing. Measure the height and width inside the seal channel, then note the depth of the groove if there is one. This gives you a second check against the replacement part.
One local example: a bakery in Pretoria called about a commercial oven that was losing heat and browning unevenly on the left side. The original seal had broken near the hinge and the door looked fine from the outside. Once the team measured the frame opening properly, they found the gasket size was correct but the profile had been sitting too shallow in the channel. The right fitting restored the seal and cut the heat bleed that was wasting power through load-shedding backup periods.
- Measure the door opening at the top, middle and bottom
- Check both sides for distortion or bent metal
- Compare the opening to the old seal length and profile
Common measuring mistakes that lead to the wrong gasket
Most wrong orders come from the same few errors. Someone measures across the face of the oven instead of the seal line, or they forget to account for a corner join. Sometimes the seal is still warm and stretched, or it has been pinched in one section for months so the reading is not true to size.
Do not guess by oven capacity either. Two 6 tray ovens may use different gaskets even if they take the same pans. Also watch for doors that close with a latch versus a drop handle, because the compression point changes. If the old seal has been repaired before with adhesive or a makeshift patch, throw that measurement out and work from the groove or the original fitting point.
- Do not measure a stretched or heat damaged seal once and trust it
- Do not order by brand class alone
- Do not ignore bent hinges or worn latches
What to send when you ask for a replacement
The quickest way to get the right oven seal is to send a clear set of details together. That helps with compatibility checks before the part is packed and leaves less room for delays at receiving. If your site is in Midrand, Johannesburg, Cape Town or a smaller town further out, the same rule applies: the better the details, the smoother the order.
Send the measurements, a photo of the old seal, the oven model plate and a note on where the seal fits. If the oven is used for baking, roasting or heavy wet cooking, say so. Steam, frequent door opening and salty air near the coast can all affect the life of the replacement. A correct part fit is only half the job, the rest is making sure it is seated properly and tested after fitting.
- Measurements in millimetres
- Photo of the old seal and fixing points
- Oven model and serial information
- Any notes on leaks, hot spots or door issues
Fit and test it before the next service rush
Once the new gasket arrives, inspect it before fitting. Check that the corners match, the profile is correct and the length is close to the measured opening with enough allowance for tension. Fit it evenly all the way around and make sure the join sits neatly. If the door still does not close cleanly, there may be a hinge, latch or frame issue that needs attention too.
After fitting, run a simple heat test. Close the oven and feel for escaping heat around the door edges once it has come up to temperature. If a strip of paper pulls out too easily at one point, that area may not be sealing. A careful post-fit test is worth the time because an oven that leaks heat burns more power and gives uneven results, which can upset service times for the whole shift.
Measure once, measure again and fit with care. That small bit of effort can keep a commercial kitchen moving without a last minute part swap.